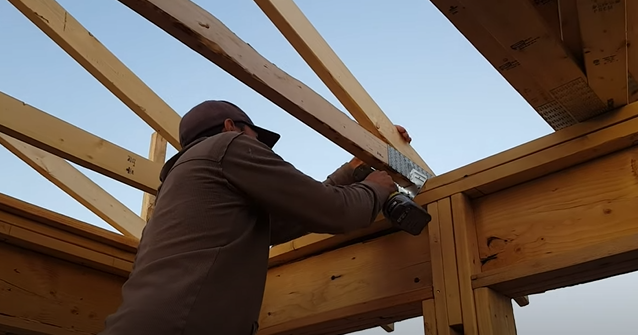
Attaching trusses to the top plate is a critical step in the construction of a roof.
This process involves securing the trusses, which are the framework for the roof, to the top plate of the walls.
Proper attachment ensures the roof’s stability, strength, and overall integrity.
This article will guide you through the process, highlighting the key techniques and considerations to ensure a successful installation.
Key Takeaways:
- Understanding the importance of correctly attaching trusses to the top plate.
- Step-by-step guide on the process.
- Safety precautions and equipment needed.
- Tips for ensuring a secure and stable attachment.
Understanding Trusses and Top Plates
What Are Trusses?
Trusses are the triangular framing structures designed to support the roof. They are engineered to distribute the weight of the roof evenly to the walls of the building.
What Is a Top Plate?
The top plate is the horizontal beam running along the top of the wall studs. It serves as the connecting point for the roof trusses and the walls.
Preparing for Installation
Safety Equipment
- Hard hats
- Safety glasses
- Gloves
Tools and Materials
- Hammer or nail gun
- Truss clips or hurricane ties
- Measuring tape
- Ladder or scaffolding
Step-by-Step Guide to Attaching Trusses
Step 1: Positioning the Trusses
The first step is to lift the trusses onto the top of the walls, positioning them precisely where they will be installed.
Step 2: Aligning and Spacing
Ensure each truss is aligned correctly with the layout marks on the top plate and spaced according to the architectural plans.
Step 3: Securing the Trusses
Use truss clips or hurricane ties to secure the trusses to the top plate. This involves nailing the ties into both the truss and the top plate to provide a strong, stable connection.

Ensuring Proper Alignment and Spacing
Importance of Accuracy
Proper alignment and spacing are crucial for the structural integrity of the roof and the overall building.
Tools for Ensuring Alignment
A long, straight board or laser level can help ensure that the trusses are aligned correctly along the top plate.
Common Challenges and Solutions
Handling Warped or Twisted Trusses
Sometimes trusses may warp or twist due to moisture or improper storage. It’s essential to correct these deformities before attachment.
Dealing with Uneven Top Plates
In cases where the top plate is not level, adjustments may need to be made to the trusses or the plate itself to ensure a level roof.
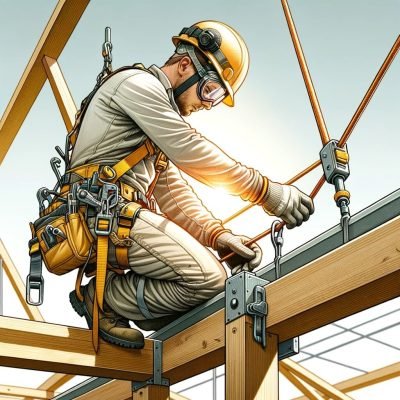
Safety Precautions
Working with trusses involves heights and heavy lifting, so it’s crucial to follow safety protocols to prevent accidents.
Relevant YouTube Videos
For visual learners, these YouTube videos provide practical demonstrations of attaching trusses to top plates:
How To Attach Trusses To Top Plate
Attaching trusses to the top plate is a critical step in the construction of a roof. This process involves several key techniques and materials to ensure a secure and stable roof structure. In this second part of our comprehensive guide, we will delve deeper into the methods used, highlight some frequently asked questions, and provide additional resources to help you through the process.
Key Takeaways
- Safety First: Always prioritize safety by using appropriate gear and ensuring the structure can support your weight.
- Proper Alignment: Ensure trusses are perfectly aligned before securing them to the top plate.
- Use of Connectors: Metal connectors, such as hurricane ties, provide a strong bond between trusses and the top plate.
Frequently Asked Questions
What Are Trusses?
Trusses are pre-engineered wood frameworks that support the roof and transfer loads to the walls. They are designed to provide a stable base for the roof covering and to resist wind and snow loads.
How Do I Ensure The Trusses Are Properly Aligned?
Use a string line across the top peaks of the trusses to ensure they are in a straight line. Adjust as necessary before securing.
What Type of Fasteners Should I Use?
The type of fasteners will depend on the truss design and local building codes. Generally, galvanized nails or structural screws are used in conjunction with metal connectors.
Can I Attach Trusses Alone?
It is possible but not recommended. The size and weight of trusses typically require at least two people to maneuver and attach them safely.
Step-by-Step Guide
- Preparation: Before attaching trusses, ensure the wall plates are straight, level, and securely fastened to the building’s frame.
- Laying Out Trusses: Place the trusses on the top plate according to the layout plan. Use temporary bracing to hold them upright.
- Alignment: Check the alignment of the trusses with a string line. Adjust as necessary to ensure they are straight.
- Securing Trusses: Attach the trusses to the top plate using metal connectors and fasteners as specified in the building plan or local building codes.
- Permanent Bracing: Install permanent bracing as per the truss manufacturer’s instructions to prevent lateral movement and ensure the roof’s structural integrity.
Installation Tips
- Use The Right Tools: A pneumatic nail gun can save time and ensure nails are driven correctly.
- Check Local Building Codes: Always comply with local building regulations regarding truss installation.
- Inspect Trusses Before Installation: Look for any damage or defects that could affect the structural integrity.
Additional Resources
For more detailed instructions and visual aids, consider the following resources:
External Links
- For a comprehensive understanding of truss design and safety guidelines, visit the Truss Plate Institute website. https://www.tpinst.org
- The American Wood Council offers a range of resources on wood construction, including truss installation. https://awc.org
Conclusion
While this guide provides a thorough overview of attaching trusses to the top plate, always consult with a professional engineer or local building authority to ensure compliance with all regulations and safety standards. Proper installation is crucial to the longevity and safety of your building project.