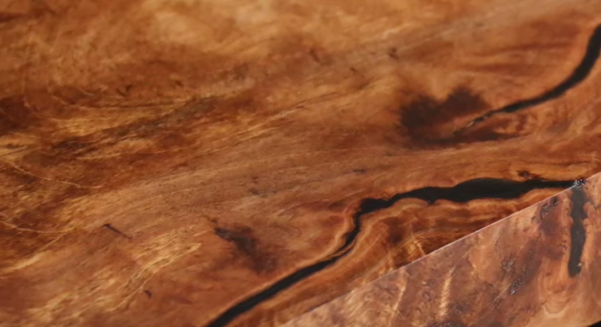
Cedar wood is renowned for its durability and aromatic properties, making it a popular choice for outdoor furniture, decking, and siding.
However, over time, exposure to the elements can cause cedar to change color, losing its rich, reddish-brown hue.
To preserve the natural color of cedar, it is crucial to seal it properly.
In this article, we will explore various methods and products that can be used to seal cedar without altering its color.
Key Takeaways:
- Choosing the right sealer is crucial to maintain the natural color of cedar.
- Proper preparation of the cedar surface is essential before applying the sealer.
- Regular maintenance is required to ensure the longevity of the sealer and the preservation of the cedar’s color.
Choosing the Right Sealer
Types of Sealers
When it comes to sealing cedar, selecting the right sealer is paramount. There are primarily two types of sealers: oil-based and water-based.
- Oil-Based Sealers: These sealers penetrate deep into the wood fibers, providing robust protection against moisture and UV rays. They are ideal for maintaining the natural color of cedar.
- Water-Based Sealers: These are eco-friendly options that offer protection against water damage and UV rays, but they may not penetrate as deeply as oil-based sealers.
Considerations for Choosing a Sealer
When selecting a sealer, consider the following factors:
- UV Protection: Choose a sealer with UV blockers to prevent the cedar from graying due to sun exposure.
- Moisture Resistance: Opt for a sealer that offers excellent water resistance to protect the cedar from rot and decay.
- Color Preservation: Select a sealer that is clear or transparent to avoid altering the cedar’s natural color.

Preparing the Cedar Surface
Cleaning the Cedar
Before applying the sealer, it is essential to clean the cedar surface thoroughly. Remove any dirt, debris, mildew, or old finishes that may hinder the adhesion of the sealer. Use a mild detergent and a soft brush to clean the cedar gently, and allow it to dry completely.
Sanding the Surface
Sanding the cedar surface is crucial to open up the wood pores, allowing the sealer to penetrate effectively. Use a fine-grit sandpaper and sand in the direction of the wood grain. Wipe off any sanding dust before applying the sealer.

Application of Sealer
Tools and Materials
To apply the sealer, gather the following tools and materials:
- Brush or Roller: Use a high-quality brush or roller to ensure even application of the sealer.
- Sealer: Choose a suitable sealer based on your requirements and preferences.
- Painter’s Tape: Use painter’s tape to protect areas that do not need sealing.
Application Process
Follow the manufacturer’s instructions on the sealer container for the best results. Typically, the application process involves applying a thin, even coat of sealer, allowing it to dry, and then applying a second coat if necessary.

Maintenance of Sealed Cedar
Regular maintenance is essential to ensure the longevity of the sealed cedar. Clean the cedar surface periodically to remove dirt and debris. Reapply the sealer as needed, based on the wear and tear and the manufacturer’s recommendations.
Additional Tips
- Test the Sealer: Before applying the sealer to the entire cedar surface, test it on a small, inconspicuous area to ensure it does not change the color of the cedar.
- Ventilation: Ensure proper ventilation when applying the sealer, especially if using an oil-based sealer, to avoid inhaling harmful fumes.
- Weather Conditions: Avoid applying the sealer in extreme weather conditions such as high humidity or temperatures, as it may affect
Advanced Sealing Techniques
Understanding Wood Grain
To effectively seal cedar without changing its color, understanding the wood grain is crucial. The wood grain affects how the sealer is absorbed, impacting the final appearance.
- Straight Grain: Allows for even absorption of the sealer, maintaining uniform color.
- Cross Grain: May result in uneven absorption, leading to color variations.
Choosing Eco-friendly Sealers
With growing environmental concerns, opting for eco-friendly sealers is a responsible choice. Look for sealers with low VOC levels and those that are water-based, as they tend to have a lesser environmental impact.
Application Techniques
Proper application techniques are paramount to ensure the sealer is effectively absorbed without altering the color of the cedar.
- Brush Application: Ideal for small surfaces and provides control.
- Spray Application: Suitable for large surfaces and ensures even coverage.
Troubleshooting Common Issues
Uneven Coloration
If the cedar shows signs of uneven coloration after sealing, it may be due to uneven application or absorption of the sealer. Sanding the surface lightly and reapplying the sealer can resolve this issue.
Peeling or Cracking Sealer
If the sealer is peeling or cracking, it may be due to the application of thick coats or inadequate drying time between coats. Removing the peeling sealer and reapplying thin coats can rectify this.
Maintenance and Upkeep
Regular Cleaning
Regular cleaning of sealed cedar is essential to maintain its appearance and prolong the life of the sealer. Use a mild detergent and avoid abrasive cleaners that can damage the sealer.
Periodic Reapplication
Depending on exposure to the elements and wear and tear, periodic reapplication of the sealer may be necessary to maintain the cedar’s color and protection level.
Expert Advice and Recommendations
Consulting with Woodworking Experts
For personalized advice and recommendations on sealing cedar without changing its color, consulting with woodworking experts or experienced professionals in the field is beneficial.
Exploring Product Reviews and Tutorials
Exploring product reviews and tutorials online can provide insights into the effectiveness of different sealers and application techniques.
Additional Resources
- Advanced Wood Sealing Techniques
- How Do You Protect Cedar Without Changing Color? – Grafixfather
- How can I prevent outdoor cedar projects from losing their color? – Woodworking Stack Exchange
- 3 Ways To Seal Cedar Wood | SacredSmokeHerbals.com
Relevant Products and Resources
For more information on cedar sealers and application methods, refer to the following resources: