Plywood is a versatile and widely used material in construction, furniture making, and various DIY projects.
Despite its strength and durability, plywood can suffer from damage such as water exposure, cracks, dents, and holes over time. Repairing plywood efficiently can extend its life and maintain its aesthetic appeal.
This article will guide you through the steps and techniques to repair plywood effectively, ensuring your projects remain sturdy and visually pleasing.
Key Takeaways:
- Understanding the extent of damage is crucial before starting any repair work.
- Proper preparation of the surface is essential for a successful repair.
- Choosing the right filler material depends on the type of damage and the intended use of the plywood.
- Finishing touches are important to restore the plywood’s appearance and protect it from future damage.
Identifying the Damage
Before attempting any repairs, it’s important to assess the extent and type of damage your plywood has sustained. This will determine the repair method and materials required.
Types of Plywood Damage
- Water Damage: Swelling, warping, or discoloration indicates water damage.
- Physical Damage: Cracks, holes, or dents are forms of physical damage.
- Delamination: Layers of plywood separating or peeling away.
Preparing the Plywood for Repair
Proper preparation is key to a successful repair. Start by cleaning the area around the damage. Remove any loose or damaged wood fibers with a scraper or sandpaper. If dealing with water damage, ensure the plywood is completely dry before proceeding.
Cleaning and Drying
- Remove debris: Clean the area thoroughly.
- Dry the plywood: If water damage is present, allow time for the plywood to dry out completely.
Repairing Minor Damage
Minor damages like scratches, small cracks, or dents can often be repaired with wood filler or putty.
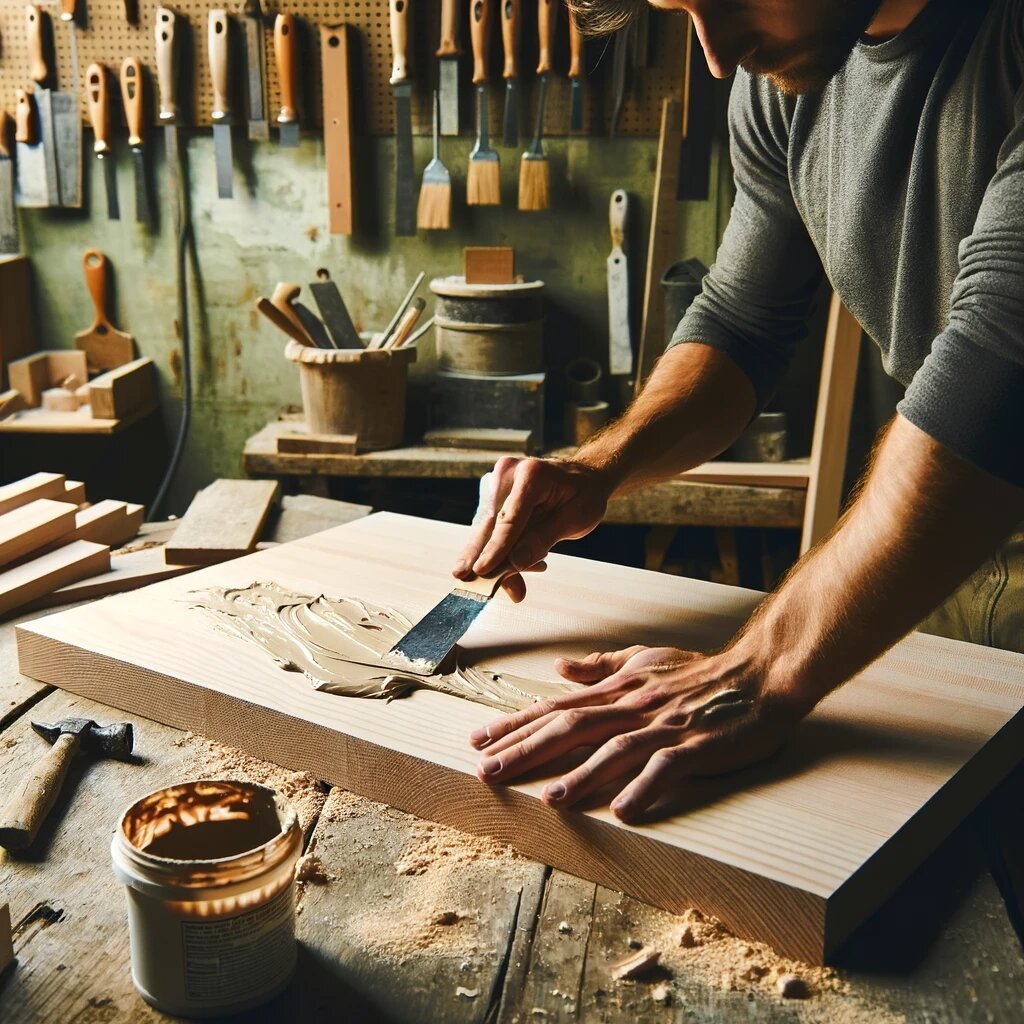
Applying Wood Filler
- Choose a wood filler that matches the plywood.
- Apply the filler to the damaged area using a putty knife.
- Smooth the filler and let it dry according to the manufacturer’s instructions.
- Sand the area until it’s flush with the surrounding surface.
Repairing Major Damage
For more significant damage, such as large holes or severe water damage, a more extensive repair may be necessary.
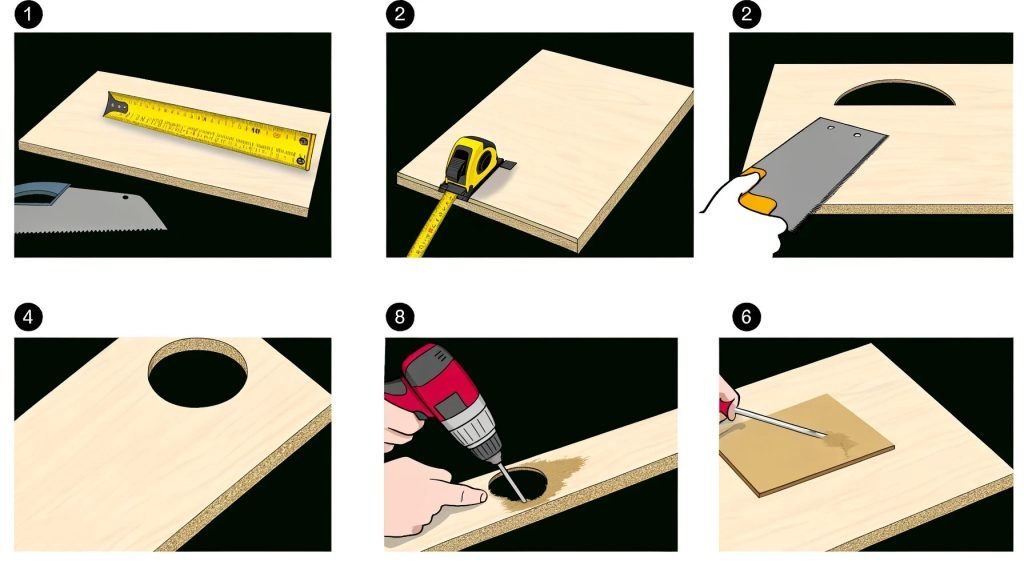
Patching Holes
- Cut out the damaged area to create a clean, square hole.
- Cut a piece of plywood to fit as a patch.
- Apply wood glue on the edges of the hole and place the patch in position.
- Secure the patch with screws or nails and allow the glue to dry.
- Fill any gaps with wood filler, then sand smooth.
Addressing Water Damage and Delamination
Water damage and delamination require special attention to prevent further deterioration.
Treating Water Damage
- Remove any soft, rotted wood.
- Apply a wood hardener to solidify the area.
- Fill with an epoxy filler for a durable repair.
Repairing Delamination
- Inject wood glue using a syringe into the delaminated layers.
- Clamp the plywood until the glue dries.
Sanding and Finishing
After the repair work is complete, sanding the area smooth and applying a finish will protect the plywood and improve its appearance.
Sanding
- Start with coarse-grit sandpaper and progress to finer grits.
- Sand until the repair is smooth and level with the surrounding area.
Finishing
- Apply a sealant or paint to match the rest of the plywood.
- This not only improves the look but also protects the repair from moisture and wear.
As we delve deeper into the nuances of plywood repair, incorporating insights from StringPulp.com can provide additional depth and perspective on woodworking techniques and tools that are beneficial for this process. Here are three selected resources from StringPulp.com that align with our topic:
- Woodworking Tools & Techniques – Explore a range of tools and techniques that can enhance your plywood repair projects.
- CNC Machines & Software – Understand how CNC technology can be applied to woodworking and potentially aid in complex repair tasks.
- Jigsaws & Saws – Dive into the specifics of using jigsaws and saws, which are essential for cutting out damaged sections of plywood or creating patches.
Integrating these resources into our guide not only broadens the scope of information but also connects readers with practical tools and advanced techniques for repairing plywood.
Next, let’s enhance our article with images created using Argil AI to visually demonstrate the repair processes discussed. We’ll also seek out relevant external links to provide additional resources for our readers.
To complement our guide on repairing plywood, incorporating external resources can provide additional insights and practical tips. Here are some valuable external links that offer further information and products related to plywood repair:
- Platinum Patch™ Advanced Exterior Filler – DAP Global – Ideal for filling holes, cracks, and other damages in various surfaces including wood.
- E-Wood epoxy wood filler – Perma-Chink Systems – Use E-Wood to replace missing sections of window sills, frames, furniture, or any wood structure.
- Simple fix suggestions needed for damaged plywood paneling – DIY Stack Exchange – A community-driven platform where individuals share their experiences and solutions for repairing damaged plywood.
Frequently Asked Questions (FAQs)
What is the best filler for plywood repairs?
For minor repairs, such as filling small holes or cracks, a high-quality wood filler or putty is ideal. For larger damages, especially in structural applications, an epoxy filler provides strength and durability. Products like Minwax High Performance Wood Filler or Abatron WoodEpox are excellent choices.
Can water-damaged plywood be repaired, or should it be replaced?
This depends on the extent of the damage. If the plywood is slightly warped but structurally sound, it can often be repaired using wood hardener and filler. However, if the plywood is severely warped, delaminated, or rotted, replacement is the safer option.
How can I prevent further damage to repaired plywood?
After repairing, it’s crucial to protect the plywood from elements that caused the initial damage. Apply a waterproof sealant if moisture was the issue, and ensure the plywood is properly maintained and inspected regularly for any signs of damage.
Advanced Repair Techniques
For those facing more challenging repair scenarios, such as extensive water damage or large missing sections, advanced techniques and materials may be required.
Epoxy Injections for Delamination
Epoxy injections can effectively bond delaminated layers of plywood. This method involves drilling small holes into the delaminated areas and injecting epoxy resin to reattach the layers.
Fabricating New Pieces for Large Damages
When dealing with large areas of damage, fabricating new pieces of plywood to replace the damaged sections can be a practical solution. This involves cutting a piece of plywood to match the damaged area’s size and shape and then integrating it with glue and screws.
Additional Resources
To further assist with your plywood repair projects, here are additional resources, including external links and YouTube videos, that provide valuable information and visual guides:
- How to Use Epoxy on Wood for Repairs – Family Handyman – A detailed guide on using epoxy for wood repairs, which is particularly relevant for plywood.
- Understanding Plywood Grades and Specifications – The Spruce – This article helps you choose the right type of plywood for your projects and repairs.
YouTube Videos for Visual Guidance
Internal Links from StringPulp.com
For those looking to deepen their woodworking knowledge and skills, consider exploring these topics on StringPulp.com:
- Best Practices for Using a Router in Woodworking – Enhance your repair work with precise cuts and shapes.
- Tips for Cutting Curves in Wood: Techniques and Tools – Useful for when repairing plywood requires intricate cuts.
- How to Choose the Right CNC Machine for Your Needs? – For those considering advanced woodworking and repair techniques.